I am going to provide you some Good Android interview question . this type of question Generally asked in Telephonic interview or 1st round of Face to Face interview.
1.What is Activity ?
A single screen in an application, with supporting Java code. It support user interface file and handle events.
2.What is Intent ?
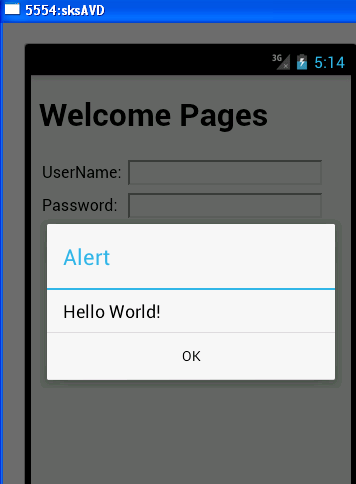
It is way to interlinking the activity class to handle information exchange . It is a way to move from one screen(Activity) to another screen(activity). For simple screen to screen movement Intent used like this way
Intent i = new Intent(this, NewActivity.class)
startActivity(i);
3.What is the way to exchange Data between the Activity by using Intent?
There are two way to send data between Activities.
(a) Forward data exchange (Activity Class A to B)
in class A
Intent i = new Intent(this, B.class)
i.putExtra(“username”, s1)
i.put extra(“password”, s2)
startActivity(i);
where s1 and s2 is String which is holding Data and by using PutExtra we are sending this data to another screen B.
We can also use Bundle class to sent Data but we use it when we have to send a large amount of data .like this way ….
Intent i = new Intent(this, B.class)
Bundle extras = new Bundle();
extras.putString(“Name”, “Your name here”);
i.putExtras(extras);
startActivityForResult(i, 1);
(b) Backward Data Exchange (Activity Class B to A)
If you need to pass data back from an activity, you should instead use the
startActivityForResult() method. The following Try It Out demonstrates this.
In class B write following code …
Intent data = new Intent();
//---set the data to pass back---
data.setData(Uri.parse(s1));
setResult(RESULT_OK, data);
In class A use like this...
//Global Variable
int request_Code = 1;
….......
//Getting data
startActivityForResult(new Intent(“packagename.B”),request_Code);
public void onActivityResult(int requestCode, int resultCode, Intent data)
{
if (requestCode == request_Code) {
if (resultCode == RESULT_OK) {
Toast.makeText(this,data.getData().toString(),Toast.LENGTH_SHORT).show();
}
}
}
4.What is a Sticky Intent?
sendStickyBroadcast() performs a sendBroadcast(Intent) known as sticky, i.e. the Intent you are sending stays around after the broadcast is complete, so that others can quickly retrieve that data through the return value of registerReceiver(BroadcastReceiver, IntentFilter). In all other ways, this behaves the same as sendBroadcast(Intent).
One example of a sticky broadcast sent via the operating system is ACTION_BATTERY_CHANGED. When you call registerReceiver() for that action -- even with a null BroadcastReceiver -- you get the Intent that was last broadcast for that action. Hence, you can use this to find the state of the battery without necessarily registering for all future state changes in the battery.
5.What is Fragment and its functionality?
Fragment is a mini-activity. It introduced in Android 3.0 version to support GUI for a larger screen especially Tablet. It work just like activity and have same way lifeCycle.
6.What is Pending Intent ?
Pending Intent is used to grant other application the right to perform the operation you have specified as if the other application was yourself (with the same permissions and identity).
As such, you should be careful about how you build the Pending Intent often, for example, the base Intent you supply will have the component name explicitly set to one of your own components, to ensure it is ultimately sent there and nowhere else.
7.How To create Pending Intent ?
Pending Intent can be created as follows:
The last argument is the PendingIntent flag. The flags can take any of the following values:
FLAG_CANCEL_CURRENT -Flag for use with getActivity(Context, int, Intent, int), getBroadcast(Context, int, Intent, int), and getService(Context, int, Intent, int): if the described PendingIntent already exists, the current one is canceled before generating a new one.
FLAG_NO_CREATE-Flag for use with getActivity(Context, int, Intent, int), getBroadcast(Context, int, Intent, int), and getService(Context, int, Intent, int): if the described PendingIntent does not already exist, then simply return null instead of creating it.
FLAG_ONE_SHOT-Flag for use with getActivity(Context, int, Intent, int), getBroadcast(Context, int, Intent, int), and getService(Context, int, Intent, int): this PendingIntent can only be used once.
FLAG_UPDATE_CURRENT-Flag for use with getActivity(Context, int, Intent, int), getBroadcast(Context, int, Intent, int), and getService(Context, int, Intent, int): if the described PendingIntent already exists, then keep it but its replace its extra data with what is in this new Intent
A service is an application in Android that runs in the background without needing to interact with the user. As for example if you want to play music in background you can use service, if you want to collect gps data then you can use service.
Hence you can say that service is used when there is no interaction of user needed.
To create a service in android you have to extend Service base class. As for example
public class MyService extends Service {
}
Within the MyService class, you implemented three methods:
@Override
public IBinder onBind(Intent arg0) { ... }
@Override
public int onStartCommand(Intent intent, int flags, int startId) { ... }
@Override
public void onDestroy() { ... }
The onBind() method enables you to bind an activity to a service. This in turn enables an activity to directly access members and methods inside a service.
The onStartCommand() method is called when you start the service explicitly using the startService() method.
The onDestroy() method is called when the service is stopped using the stopService() method. This is where you clean up the resources used by your service.
All services that you have created must be declared in the AndroidManifest.xml like this:
2. doInBackground(Params…) – this is the method that runs on the background thread. In this method you should put all the code you want the application to perform in background. The doInBackground() is called immediately after onPreExecute(). When it finishes, it sends the result to the onPostExecute().
3. onProgressUpdate() - called when you invoke publishProgress() in the doInBackground().
4. onPostExecute(Result) – called on the UI thread after the background thread finishes. It takes as parameter the result received from doInBackground().
AsyncTask is a generic class, it uses 3 types: AsyncTask<Params, Progress, Result>.
Params – the input. what you pass to the AsyncTask
Progress – if you have any updates, passed to onProgressUpdate()
Result – the output. what returns doInBackground()
The UIThread is the main thread of execution for your application. This is where most of your application code is run. All of your application components(Activities, Services, ContentProviders, BroadcastReceivers) are created in this thread, and any system calls to As for example in a single Activity class. Then all of the life cycle methods and most of your event handling code is run in this UIThread. These are methods like OnCreate, OnPause, OnDestroy, OnClick, etc. Additionally, this is where all of the updates to the UI are made. Anything that causes the UI to be updated or changed has to happen on the UI thread.
14. What is runOnUiThread in android? when we used this?
When you explicitly spawn a new thread to do work in the background, this code is not is not run on the UIThread. So what happens if the this background thread needs to do something that changes the UI?
This is what the
15. What is Handler in android?
The
as for example
private Handler mHandler=new Handler();
now in your UI(onClick event)
mHandler.post(new Runnable(){
public void run(){
//e.g. save to the database
}
}
1.What is Activity ?
A single screen in an application, with supporting Java code. It support user interface file and handle events.
2.What is Intent ?
It is way to interlinking the activity class to handle information exchange . It is a way to move from one screen(Activity) to another screen(activity). For simple screen to screen movement Intent used like this way
Intent i = new Intent(this, NewActivity.class)
startActivity(i);
3.What is the way to exchange Data between the Activity by using Intent?
There are two way to send data between Activities.
(a) Forward data exchange (Activity Class A to B)
in class A
Intent i = new Intent(this, B.class)
i.putExtra(“username”, s1)
i.put extra(“password”, s2)
startActivity(i);
where s1 and s2 is String which is holding Data and by using PutExtra we are sending this data to another screen B.
We can also use Bundle class to sent Data but we use it when we have to send a large amount of data .like this way ….
Intent i = new Intent(this, B.class)
Bundle extras = new Bundle();
extras.putString(“Name”, “Your name here”);
i.putExtras(extras);
startActivityForResult(i, 1);
(b) Backward Data Exchange (Activity Class B to A)
If you need to pass data back from an activity, you should instead use the
startActivityForResult() method. The following Try It Out demonstrates this.
In class B write following code …
Intent data = new Intent();
//---set the data to pass back---
data.setData(Uri.parse(s1));
setResult(RESULT_OK, data);
In class A use like this...
//Global Variable
int request_Code = 1;
….......
//Getting data
startActivityForResult(new Intent(“packagename.B”),request_Code);
public void onActivityResult(int requestCode, int resultCode, Intent data)
{
if (requestCode == request_Code) {
if (resultCode == RESULT_OK) {
Toast.makeText(this,data.getData().toString(),Toast.LENGTH_SHORT).show();
}
}
}
4.What is a Sticky Intent?
sendStickyBroadcast() performs a sendBroadcast(Intent) known as sticky, i.e. the Intent you are sending stays around after the broadcast is complete, so that others can quickly retrieve that data through the return value of registerReceiver(BroadcastReceiver, IntentFilter). In all other ways, this behaves the same as sendBroadcast(Intent).
One example of a sticky broadcast sent via the operating system is ACTION_BATTERY_CHANGED. When you call registerReceiver() for that action -- even with a null BroadcastReceiver -- you get the Intent that was last broadcast for that action. Hence, you can use this to find the state of the battery without necessarily registering for all future state changes in the battery.
5.What is Fragment and its functionality?
Fragment is a mini-activity. It introduced in Android 3.0 version to support GUI for a larger screen especially Tablet. It work just like activity and have same way lifeCycle.
6.What is Pending Intent ?
Pending Intent is used to grant other application the right to perform the operation you have specified as if the other application was yourself (with the same permissions and identity).
As such, you should be careful about how you build the Pending Intent often, for example, the base Intent you supply will have the component name explicitly set to one of your own components, to ensure it is ultimately sent there and nowhere else.
7.How To create Pending Intent ?
Pending Intent can be created as follows:
PendingIntent pi= PendingIntent.getActivity(Context context, int requestCode, Intent intent, int flags)
The above line of code retrieves a PendingIntent that will start a new activity, like calling Context.startActivity(Intent)
The last argument is the PendingIntent flag. The flags can take any of the following values:
FLAG_CANCEL_CURRENT -Flag for use with getActivity(Context, int, Intent, int), getBroadcast(Context, int, Intent, int), and getService(Context, int, Intent, int): if the described PendingIntent already exists, the current one is canceled before generating a new one.
FLAG_NO_CREATE-Flag for use with getActivity(Context, int, Intent, int), getBroadcast(Context, int, Intent, int), and getService(Context, int, Intent, int): if the described PendingIntent does not already exist, then simply return null instead of creating it.
FLAG_ONE_SHOT-Flag for use with getActivity(Context, int, Intent, int), getBroadcast(Context, int, Intent, int), and getService(Context, int, Intent, int): this PendingIntent can only be used once.
FLAG_UPDATE_CURRENT-Flag for use with getActivity(Context, int, Intent, int), getBroadcast(Context, int, Intent, int), and getService(Context, int, Intent, int): if the described PendingIntent already exists, then keep it but its replace its extra data with what is in this new Intent
8.What is DDMS in android? What is its use?
The Dalvik Debug Monitor Service (DDMS) is
a debugging utility that is integrate into Eclipse through a special Eclipse
perspective. The DDMS perspective provides a number of useful features for
interacting with emulators and handsets and debugging applications.
The feature
of DDMS roughly divided into five categories as follow:-
- Task Management
- File Management
- Emulator Interaction
- Logging(LogCat)
- Screen Captures
The DDMS
tool can be launched separately from Eclipse. You can find it in the Android
SDK /tools directory
9.What is Android Emulator ? what is it limitation?
Android Emulator is virtual mobile device for testing purpose. it give a easy testing facility for mobile developer. Before final testing on real mobile device you can test your application on it. The Android emulator is integrated with Eclipse, using the ADT plug-in for the Eclipse IDE.
Some short key for Emulator functionality
1. Ctrl+F11 and Ctrl+F12 to toggle the emulator between portrait and landscape modes.
2. Press Alt+Enter to enter full screen mode with the emulator. Then press
Alt+Enter again to return to exit full screen mode.
Emulator Limitations
The Android emulator is a convenient tool, but it has a number of limitations
- The emulator is not a device. It simulates general handset behavior, not specific hardware implementations or limitations.
- Sensor data, such as satellite location information, battery and power settings, and network connectivity, are all simulated using your computer.
- Peripherals such as camera hardware are not fully functional.
- Phone calls cannot be placed or received but are simulated. SMS messages are also simulated and do not use a real network.
- No USB or Bluetooth support is available.
- Using the Android emulator is not a substitute for testing on a true Android device.
A service is an application in Android that runs in the background without needing to interact with the user. As for example if you want to play music in background you can use service, if you want to collect gps data then you can use service.
Hence you can say that service is used when there is no interaction of user needed.
To create a service in android you have to extend Service base class. As for example
public class MyService extends Service {
}
Within the MyService class, you implemented three methods:
@Override
public IBinder onBind(Intent arg0) { ... }
@Override
public int onStartCommand(Intent intent, int flags, int startId) { ... }
@Override
public void onDestroy() { ... }
The onBind() method enables you to bind an activity to a service. This in turn enables an activity to directly access members and methods inside a service.
The onStartCommand() method is called when you start the service explicitly using the startService() method.
The onDestroy() method is called when the service is stopped using the stopService() method. This is where you clean up the resources used by your service.
All services that you have created must be declared in the AndroidManifest.xml like this:
<service android:name=”.MyService” />
If you want your service to be available to other applications, you can always add an intent filter with
<service android:name=”.MyService”>
<intent-filter>
<action android:name=”com.packageName.MyService” />
</intent-filter>
</service>
11.What is IntentService in Android?If you want your service to be available to other applications, you can always add an intent filter with
an action name, like this:
<intent-filter>
<action android:name=”com.packageName.MyService” />
</intent-filter>
</service>
IntentService :- The IntentService class is a base class for Service that handles asynchronous requests on demand. It is started just like a normal service; and it executes its task within a worker thread and terminates itself when the task is completed.
the method we implement in this class is onHandleIntent() method, which is executed on a worker thread.This is where you place the code that needs to be executed on a separate thread. When the code has finished executing, the thread is terminated and the service is stopped automatically.
12.What is AsyncTask in android?
AsyncTask enables proper and easy use of the UI thread. This class allows to perform background operations and publish results on the UI thread without having to manipulate threads and/or handlers.
In order to use the AsyncTask class, you must extend it and override at least the doInBackground()method.
AsyncTask have 4 methods
- onPreExecute()
- doInBackground(Params…)
- onProgressUpdate()
- onPostExecute(Result)
2. doInBackground(Params…) – this is the method that runs on the background thread. In this method you should put all the code you want the application to perform in background. The doInBackground() is called immediately after onPreExecute(). When it finishes, it sends the result to the onPostExecute().
3. onProgressUpdate() - called when you invoke publishProgress() in the doInBackground().
4. onPostExecute(Result) – called on the UI thread after the background thread finishes. It takes as parameter the result received from doInBackground().
AsyncTask is a generic class, it uses 3 types: AsyncTask<Params, Progress, Result>.
Params – the input. what you pass to the AsyncTask
Progress – if you have any updates, passed to onProgressUpdate()
Result – the output. what returns doInBackground()
13.what is UIthread in android?
The UIThread is the main thread of execution for your application. This is where most of your application code is run. All of your application components(Activities, Services, ContentProviders, BroadcastReceivers) are created in this thread, and any system calls to As for example in a single Activity class. Then all of the life cycle methods and most of your event handling code is run in this UIThread. These are methods like OnCreate, OnPause, OnDestroy, OnClick, etc. Additionally, this is where all of the updates to the UI are made. Anything that causes the UI to be updated or changed has to happen on the UI thread.
14. What is runOnUiThread in android? when we used this?
When you explicitly spawn a new thread to do work in the background, this code is not is not run on the UIThread. So what happens if the this background thread needs to do something that changes the UI?
This is what the
runOnUiThread is for. it provides these background threads the ability to execute code that can modify the UI.15. What is Handler in android?
The
Handler class can update the user interface. A Handler provides methods for receiving instances of the Message or Runnable class.as for example
private Handler mHandler=new Handler();
now in your UI(onClick event)
mHandler.post(new Runnable(){
public void run(){
//e.g. save to the database
}
}
16. How to communicate between Service and Activity in android? or What is Broadcast Receiver?
Mostly time service run independently in android application without communicating to Activity. But in some cases it become necessary to communicate to activity. Then we have to use Broadcast Receiver to communicate between Activity and services.
Definition
A broadcast receiver is an Android component which allows to register for system or application events. All registered receivers for an event will be notified by Android once this event happens.
Implementation
A Broadcast Receiver extends the BroadcastReceiver class and which is registered as a receiver in an Android Application via the AndroidManifest.xml file(or via code).
Alternatively to this static registration, you can also register a Broadcast Receiver dynamically via the Context.registerReceiver() method.
If the event for which the Broadcast Receiver has registered it receives a Broadcast Intents from the Android system in it's onReceive() method.